One of the cool things about having Lightroom CC on your mobile device is the ability to email and post to social media directly from your device. If you are going to use this handy feature, it’s good to know how to watermark your photos before posting them. I am often surprised by how many Lightroom CC mobile users don’t realize how easy it is to apply a watermark.
People have mixed feelings about watermarks. While some find them distracting, most professionals use watermarks to identify them as the maker of the image. When it comes to watermarking for me, it really depends on the type of image I’m sharing. If it’s a cute photo of our dogs doing something silly, I won’t use a watermark. When it’s one of my professional images, I always apply a watermark. The steps below detail how easy it is to turn on watermarking in Lightroom CC on you mobile device.
1) Open Lightroom CC on your mobile device and go to the main screen that shows your albums. Tap on the Lr icon at the top above where it says “All Photos” (circled in Figure 1) to open the Settings menu shown in Figure 1.
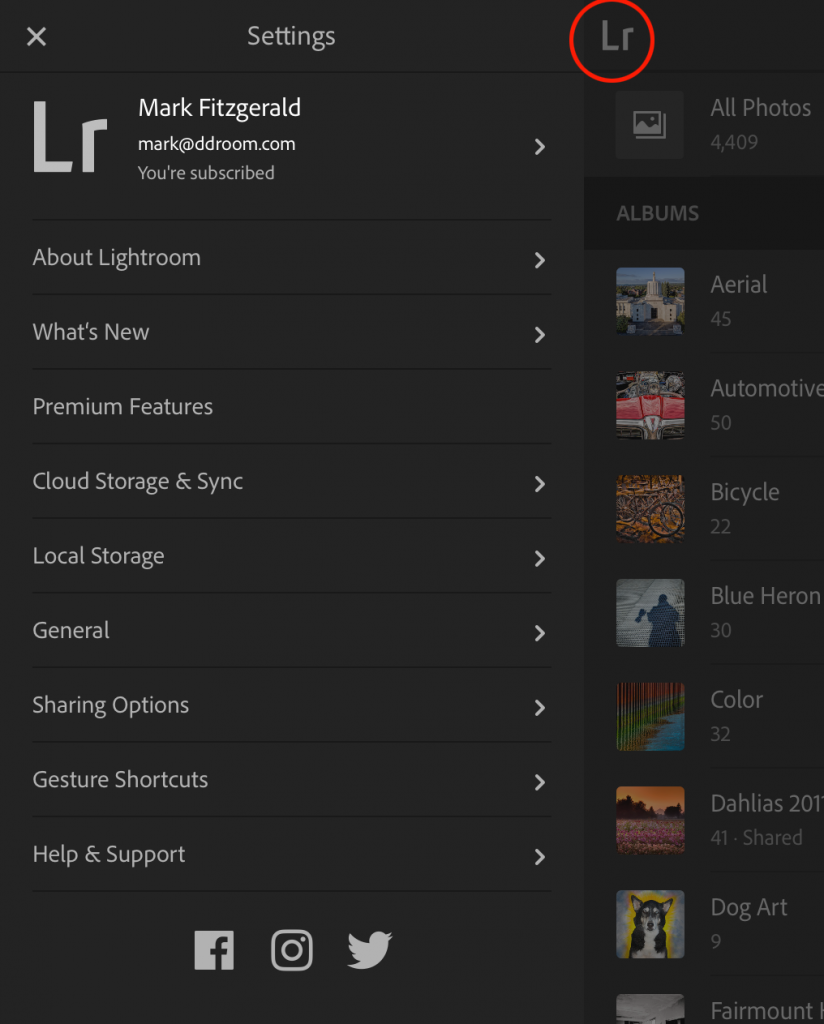
Figure 1
2) Tap Sharing Options to open the dialog shown in Figure 2. Tap the button to the right of “Include” so that it moves to the On position. This turns on the watermarking feature for all of your sharing. Type the watermark information you want to display on your photos in the text box.

Figure 2
3) Tap Customize to open the dialog shown in Figure 3. (A sample image is displayed to help you visualize what your watermark will look like.) This dialog enables you to customize the look of your watermark. Use the first row of options to make the text bold and/or italic. And you can rotate it to run down the side of the image instead of across the bottom. And you can use the color swatches to make the watermark text white or black.
Then use the Size, Opacity, and Offset sliders to further customize the look of the watermark. Increasing the value of the Offset slider moves the watermark away from the edge of the image and toward the center. I prefer to give my watermark a bit of offset because I don’t like it too close to the edge.
The circles around the outside and in the center of the sample image represent anchor points. These are used to anchor the watermark to a particular area of the image. In Figure 3 you can see that I have it anchored at the bottom-left. I recommend experimenting with the Customize options until you find the right combination for the watermark look and feel that works for you.
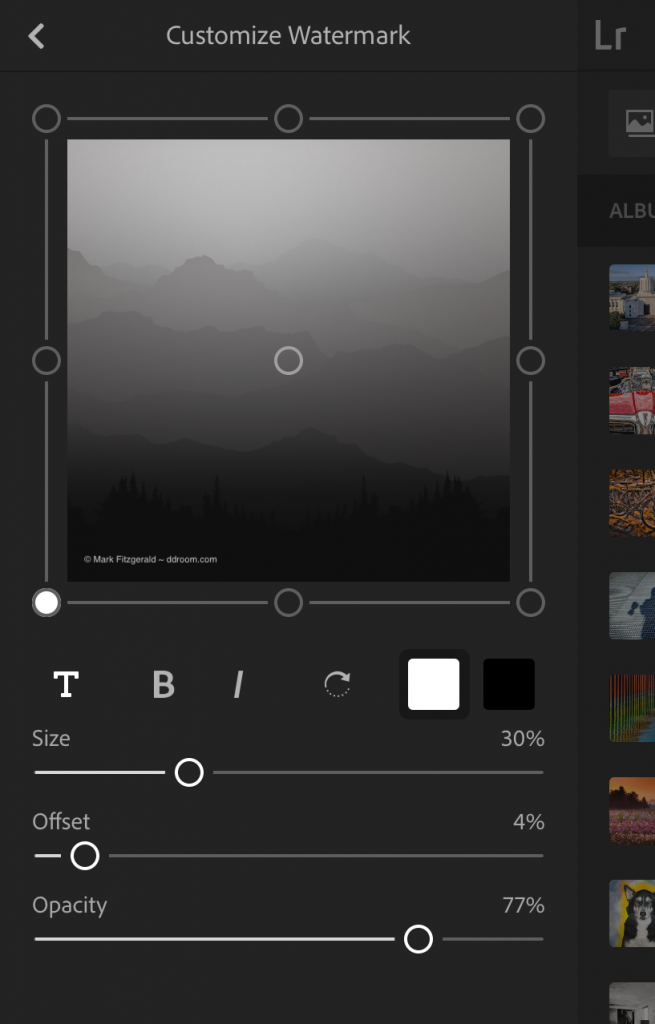
Figure 3
4) After you have the watermark looking the way you like it, use the back arrow at the top to back out of the dialogs until you’re back to the main Settings dialog (Figure 1). Then tap the “X” to close that dialog.
That all there is to it. Now your watermark is ready to go and will be on the images you share via email and social media. If you want to see how to use Lightroom CC on your mobile device to easily share photos to Instagram, check out this blog: Using Lightroom CC To Simplify Your Instagram Workflow.