The latest versions of Lightroom (Lightroom CC and Lightroom 6) have a new feature for merging HDR files within Lightroom. In the past it has been necessary to use Photoshop or HDR plug-ins like Photomatix Pro or Nik HDR Pro. As someone who shoots HDR regularly and uses Lightroom for the majority of his workflow, I like the idea of having HDR built directly into Lightroom. Even though I use Photomatix Pro for my HDR, Lightroom is a big part of my HDR process. I use it to prepare source photos with a few basic settings, such as white balance and basic lens corrections. Then I merge those photos using Lightroom’s plugin for Photomatix Pro to create an HDR file. Finally I import the merged file into Lightroom for fine-tuning. This last part of the process is where the magic often happens. But to make that magic I need a high quality merged HDR file. If Lightroom could become my go-to HDR merging solution, it would save me time and streamline my postproduction workflow.
I decided to do a test to compare Lightroom’s HDR feature to Photomatix Pro, my go-to HDR program. Below are two images merged from a three-photo HDR series I shot during blue hour last night in downtown Portland. The first image is the result of merging the three source files (2-,0,+2 EV) in Lightroom. The second image is the same set of files merged in Photomatix Pro’s Exposure Fusion Natural. Both sets of images had medium deghosting applied during the HDR process. Both merged files were processed further in Lightroom using the Basic panel, Detail panel, and gradients at the top and bottom of each image. In both cases my goal was to make each image look as good as I could after the merge.
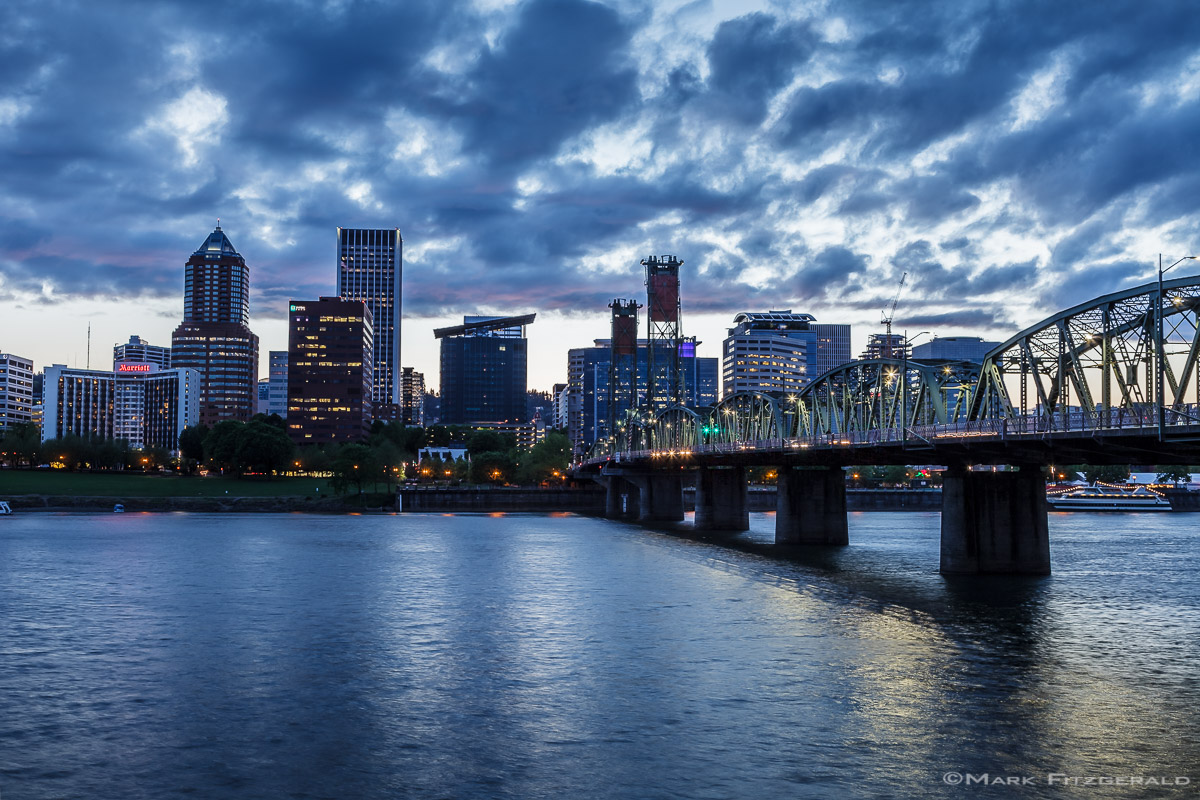
Figure 1: Blue hour in Portland, Oregon. This image was merged to HDR in Lightroom and then fine-tuned using Lightroom’s Develop module. (Click photo to open in new window.)
 Figure 2:Fully processed HDR Merged with Photomatix Pro and fine-tuned in Lightroom’s Develop module. (Click photo to open in new window).
Sharpness and Noise
The screenshot below shows a detail of each image at 1:1 magnification. The Lightroom HDR is on the left and the Photomatix Pro image on the right. The main differences to notice are sharpness and noise. The Photomatix Pro image has a greater range of detail in the shadows, such as the bushes and seawall. The Lightroom HDR image on the left has less shadow detail. In fact I had to apply +75 to Shadows in the Basic panel to get them this light. (I applied +40 to the Photomatix Pro image.)
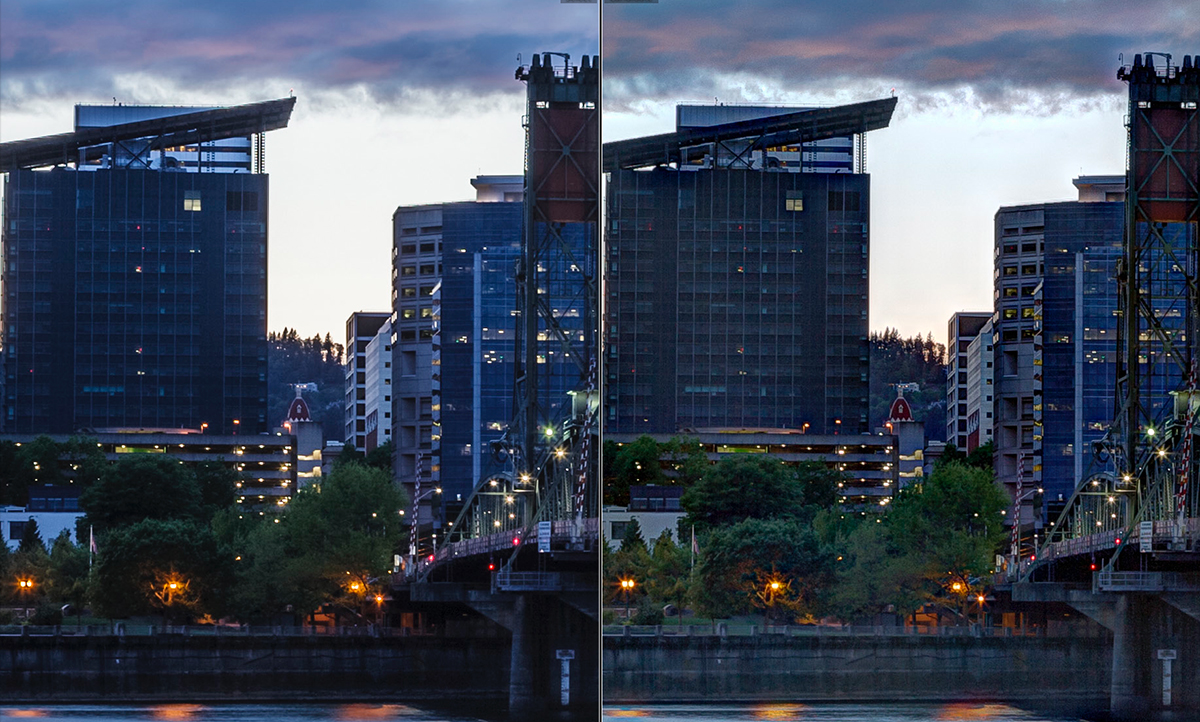
Figure 3: Detailed comparison at 1:1 magnification. Lightroom HDR on left, Photomatix Pro HDR on Right.
Both versions shown above received the same level of sharpening for this comparison (+25, 1.0 25, 0 in the Detail panel). The Lightroom HDR on the left isn’t nearly as sharp as the Photomatix Pro file on the right. Additional sharpening can be applied to improve the sharpness of the Lightroom image, but it would be difficult to get it to match the Photomatix Pro sharpness. I should mention that I applied a generous amount of Local Contrast in Photomatix Pro to get the look I like, which is sharp and crips. This option isn’t possible when merging HDR in Lightroom.
The Photomatix Pro HDR on the right shows more noise than the Lightroom HDR on the left. (Both files received +15 Luminance noise removal in Lightroom’s Detail panel.) The additional noise is most likely due to the sharper file and the lighter shadow areas. More noise removal in Lightroom would help to manage noise in the Photomatix Pro image, though it isn’t too bad considering this is a 1:1 magnification.
Ghosting in the Machine
Ghosting is a common problem when merging multiple source photos into a single HDR image. If something in the scene is moving, such as headlights on the bridge, water, and clouds, they can create ghosts in the final image. All HDR software has some sort of ghost removal to help manage this problem. In Lightroom it’s quite rudimentary. You have four choices: none, low, medium, and high. When Show Deghost Overlay is selected, a red mask overlay shows on the image to indicate where ghost removal will occur, as shown in Figure 4. The preview increases in size with higher Deghost Amount settings. Deghosting in Photomatix Pro is much more powerful. You can make small changes to the amount of deghosting, choose which source file to use as your base image, and select specific areas for selected deghosting of a problem area.
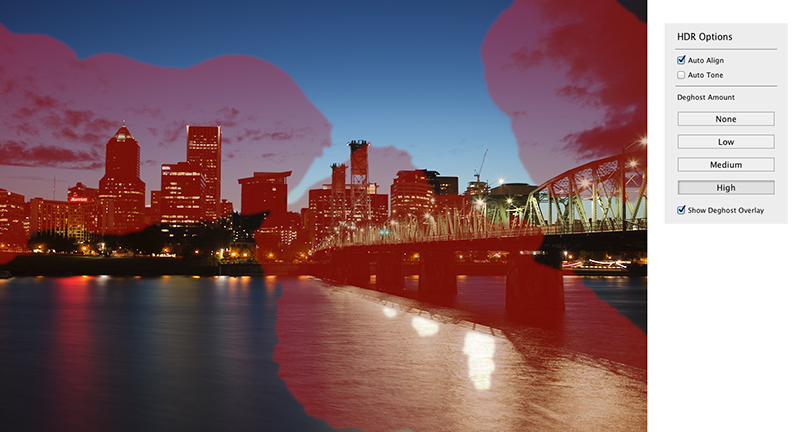
Figure 4: Lightroom uses a red mask overlay to indicate where ghost removal is applied. Selecting a higher level results in a larger masked area than selecting Low, as shown on this other shot from the blue hour shoot..
When processing the photos in Figure 1 and Figure 2 I chose a medium level of deghosting in both Lightroom and Photomatix Pro. Figure 5 below shows a detail of a classic ghosting problem – moving headlights on the bridge. The image on the left shows black artifacts in areas where the headlights were moving. I’ve experienced this numerous times when attempting to use Photoshop to create HDR files. The Photomatix HDR image on the right shows a strange blurry smear occurring where the lights were moving. The best way to solve these problems is to increase the level of deghosting. But when I attempted that, something strange happened.
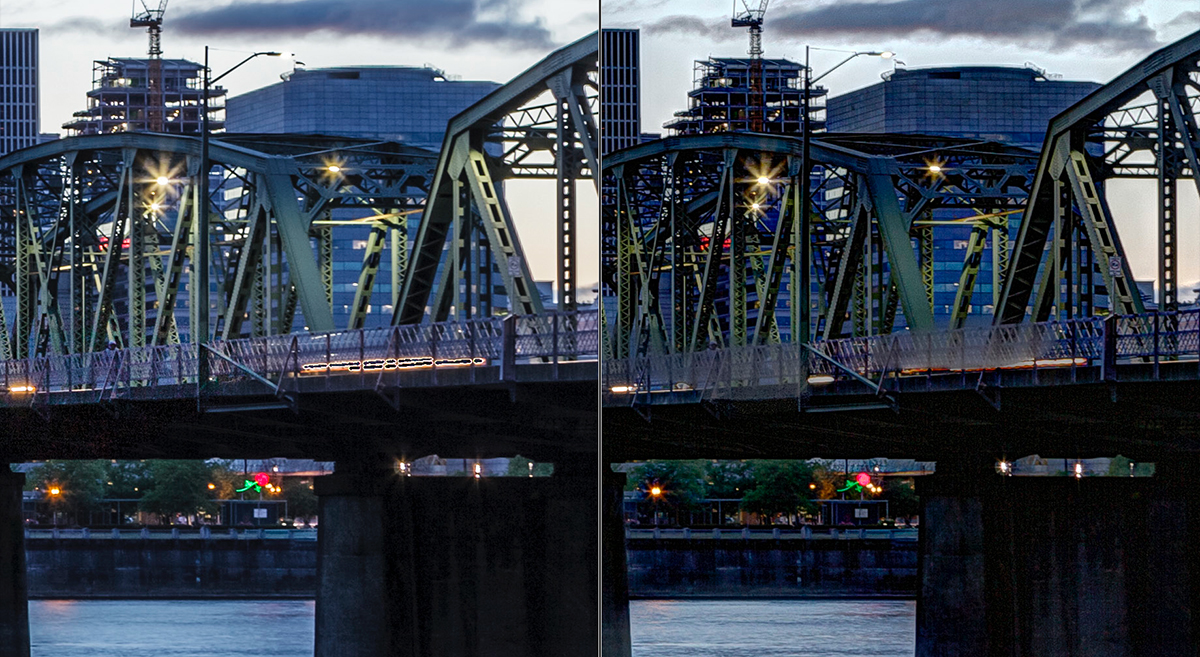
Figure 5: This comparison shows the results of medium deghosting. The headlights on the bridge in the Lightroom HDR file on the left have black artifacts outlining them. The Photomatix Pro HDR file on the right displays a bright smear along the area where the headlights were moving.
Ghost Removal and Noise
I reprocessed the source files and created new versions of Figures 1 and 2 with additional deghosting. I used the High setting in Lightroom and a value of 70 for the deghosting amount in Photomatix Pro (scale of 0-100). Then I synchronized each of the new HDR files to the files from Figures 1 and 2. As you can see in photo on the right in Figure 6, the ghosting problem is resolved. Blurred lines of headlights are isolated to single lights or short blurs. But the main thing to notice here is the massive amount of new noise in the Lightroom HDR image on the left. Where did it come from when the only difference between it and the version in Figure 5 is High Deghosting instead of Medium?
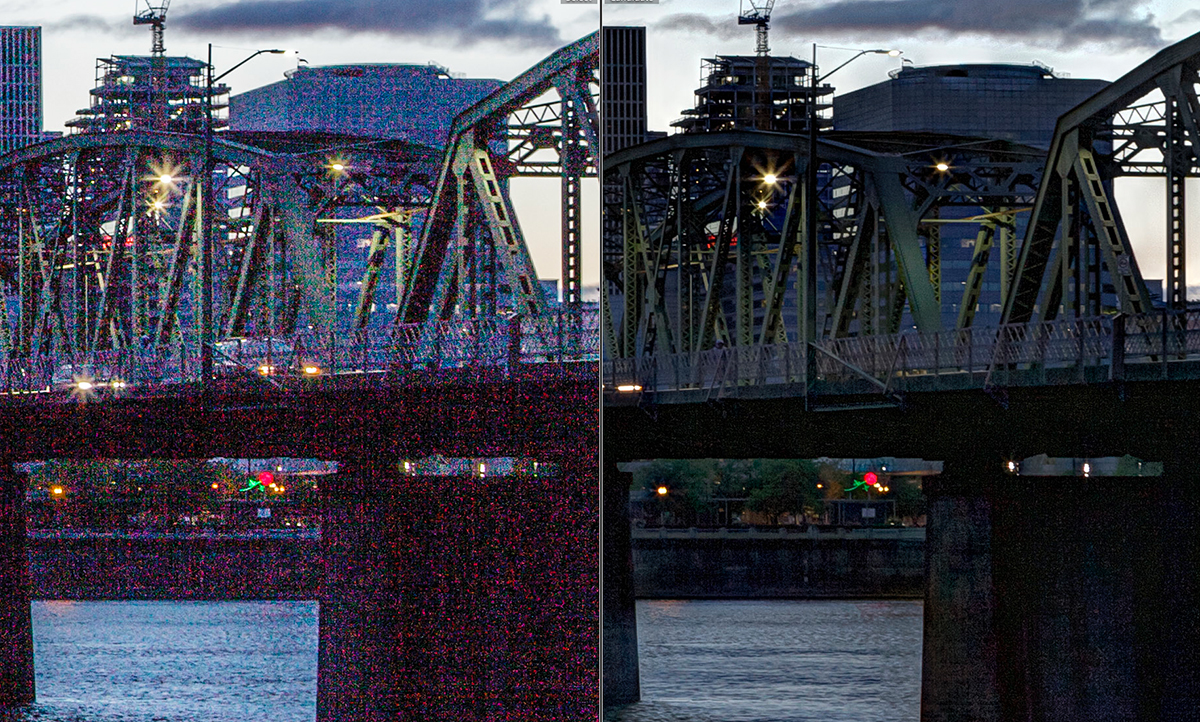
Figure 6: These photos were reprocessed with higher levels of ghost removal compared to Figures 1 and 2. Notice the extreme level of noise in the Lightroom HDR photo on the left, compared to the Photomatix Pro photo on the right.
HDR software manages ghosting by giving more weight to a single source image during the HDR merging process. When deghosting values are increased, moving objects are are removed because there is less emphasis on the content of other source photos. For example, if I have three source photos of a street scene and a person is walking through it, I’ll have three ghosts of him in the merged image. When I increase deghosting values one of the images is emphasized, removing his ghosts from the other two images. By default, Photomatix Pro uses the middle exposure value as a pivot point. You can choose an under or overexposed pivot frame if it works better.
In this case Lightroom chose to use the underexposed photo from the three source photos, which was shot at -2 EV. I was able to discern this by looking at the original source files to see where the moving headlights were in each. Because this source photo is an underexposure of an already dark scene, it contains serious noise. When that noise becomes part of the merged HDR file, it can render it unusable. Admittedly, these night photos with ghosting lights presents a worst-case scenario for HDR merging. HDR requires intentionally underexposed source photos, so noise is an issue. Underexposed photos shot at night contain a huge amount of noise. HDR software must be up to the task of managing this “intentional” noise.
Conclusion
There are almost as many ways of doing HDR as there are photographers. The HDR software you use depends mostly on your needs. If you are new to HDR and you have Lightroom CC or Lightroom 6, I strongly urge you to check it out because it’s an easy way to get introduced to HDR. You may find that it does exactly what you need with the type of photography you do. But if you plan to shoot HDR scenes that contain moving subjects, especially at night, you’ll probably want to investigate a more powerful HDR solution.