If you like shooting in black & white, you’ll love this new addition to Lightroom Classic
Many photographers who work in black & white prefer to setup their cameras with a monotone profile so that live-view and reviews on the camera back are in black and white. This helps them see the scene in black and white while shooting. Camera manufacturers use various terms for profiles, such as Picture Mode or Picture Style, as shown in the Canon EOS R menu in Figure 1.
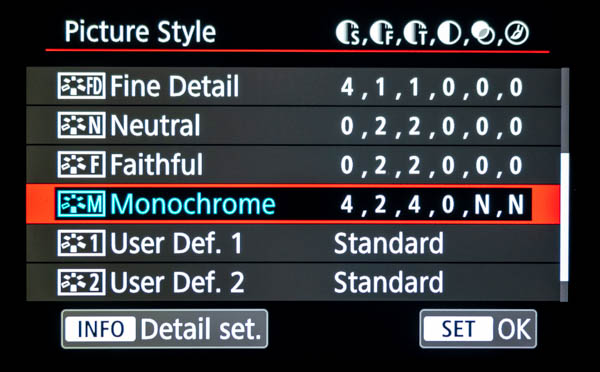
Figure 1
But when the raw files are imported into Lightroom they come in as color. This is because Lightroom replaces the in-camera profile no matter if it’s Landscape, Portrait, Monotone or whatever with a standard profile named Adobe Color. Now in the latest release of Lightroom Classic (9.2) an addition to the Presets preferences gives us the ability to import raw photos with the in-camera profiles that were used during capture.
To set this up go to Lightroom > Preferences (Mac), Edit > Preferences (Win) and choose the Presets tab. Then all you need to do is change the Master menu to Camera Settings instead of Adobe Default, as shown in Figure 2 below. Now when you import raw files from any of your cameras, the camera profile used in-camera is used in Lightroom automatically.
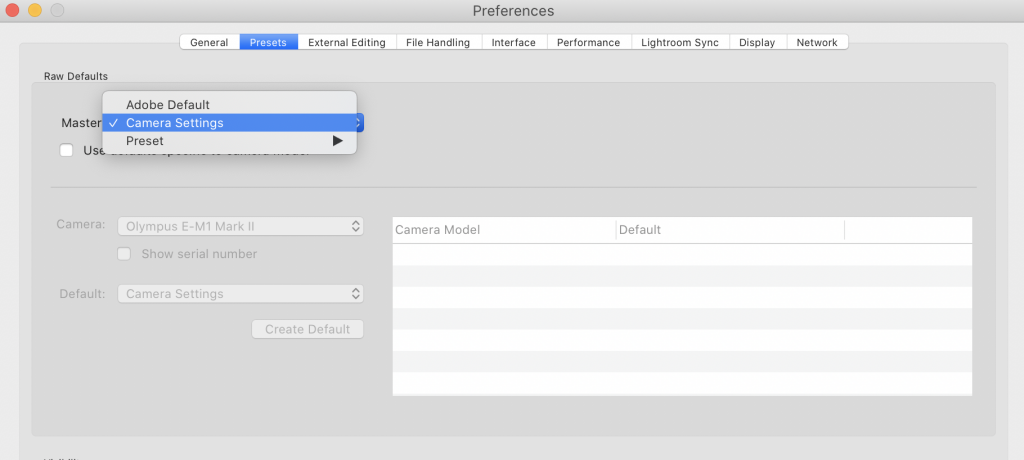
Figure 2
To see which profile Lightroom Classic is using, go to the Profile section at the top of the Basic panel in the Develop module. If your camera was setup for monotone, you’ll see the profile listed as shown in Figure 3 below. The best part is that you can change the raw file back to color by choosing Color in the Treatment section at the top of the Basic panel.
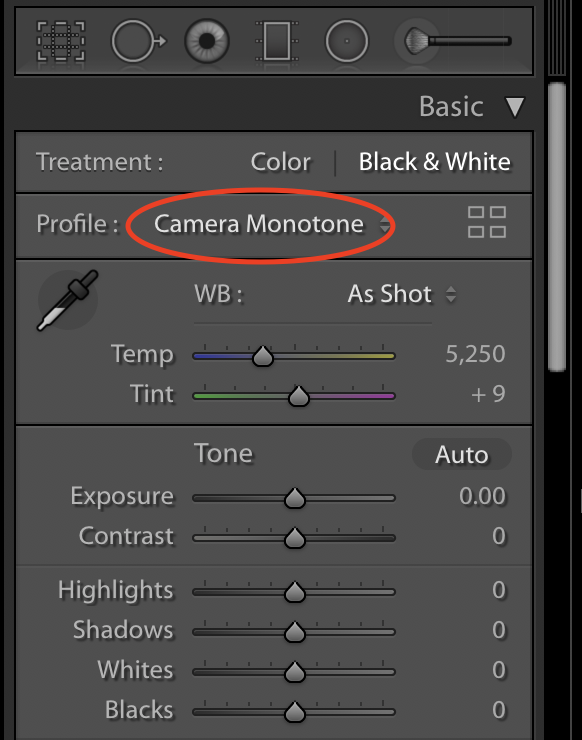
Figure 3
One thing I want to caution you about. If you have previously created import defaults for your cameras using the old method (Develop > Set Camera Defaults) to add settings like chromatic aberration correction during import, those settings will no longer be applied. The easiest way to solve this problem is to create a custom develop preset with the settings you want. Then you can choose this preset during the import process to add those settings to your raw files as they import. Figure 4 shows where I have selected an import preset that applies lens corrections and chromatic aberration removal. This is actually simpler than the old way of saving camera defaults because you only need to create one develop preset for all cameras instead of saving defaults for each camera.
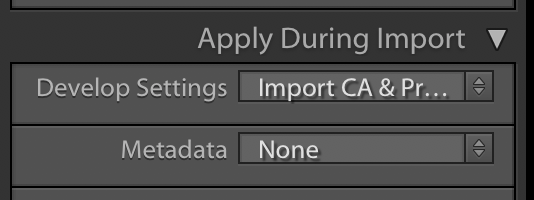
Figure 4
Naturally this isn’t just limited to monotone profiles/styles. It works for any profile you want to use in-camera when shooting raw. And the best thing is you can always revert back to the Adobe Standard profile, or any other profile you want, by changing the profile in Lightroom’s Develop module.
