
Posting photos to Instagram from your computer can be a pain in the you-know-what. That’s because Instagram is intended as a mobile platform so posting from a computer requires a special app or a workaround. Most of the workarounds I’ve seen have the user exporting a photo from Lightroom and emailing it to themselves. Then they have to save their email attachment to their photos on the mobile device before they can post. That’s not too difficult, but it isn’t very elegant. If you’re a Lightroom Classic CC user, you can create a simpler and more powerful workflow to quickly upload photos to Instagram with a few clicks.
The bird’s-eye view of the process looks like this:
- Setup mobile syncing in Lightroom Classic CC on your computer.
- Create an Instagram collection on your computer that you will use for all of your potential Instagram photos. (The only way to synchronize photos from the computer version of Lightroom Classic CC to your mobile Lightroom CC is through collections.)
- Install the Lightroom CC app on your mobile device(s).
- Upload photos on your computer to Instagram from your mobile device.
Here’s how it works:
1) Open Lightroom on your computer and click the Identity Plate at the top-left. When the dialog opens (shown in Figure 1) choose Start (to the right of Sync with Lightroom CC). Then follow the instructions to login. If you already have Sync selected, make sure it isn’t paused.
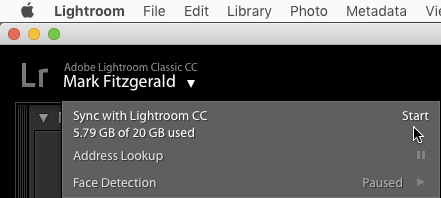
Figure 1
2) Create a new collection (Library > New Collection) and name it Instagram (shown in Figure 2). Though it isn’t necessary, I suggest making this collection the target collection to make it super simple to add photos to it by selecting them and pressing the “B” key on your keyboard.
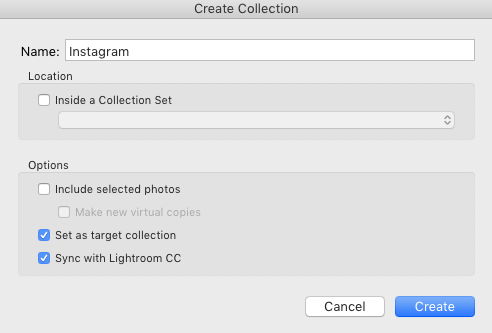
Figure 2
3) Choose some photos you want to post to Instagram and add them to the collection. I do this whenever I have a potential Instagram photo. Once they are in the collection I can post them whenever I want.
4) Install the Lightroom CC app on your mobile device and follow the instructions to login and activate it.
5) Go to your Lightroom CC Instagram collection on your mobile device and select a photo you want to upload to Instagram. Tap the Share button at the top-right (circled in Figure 3).
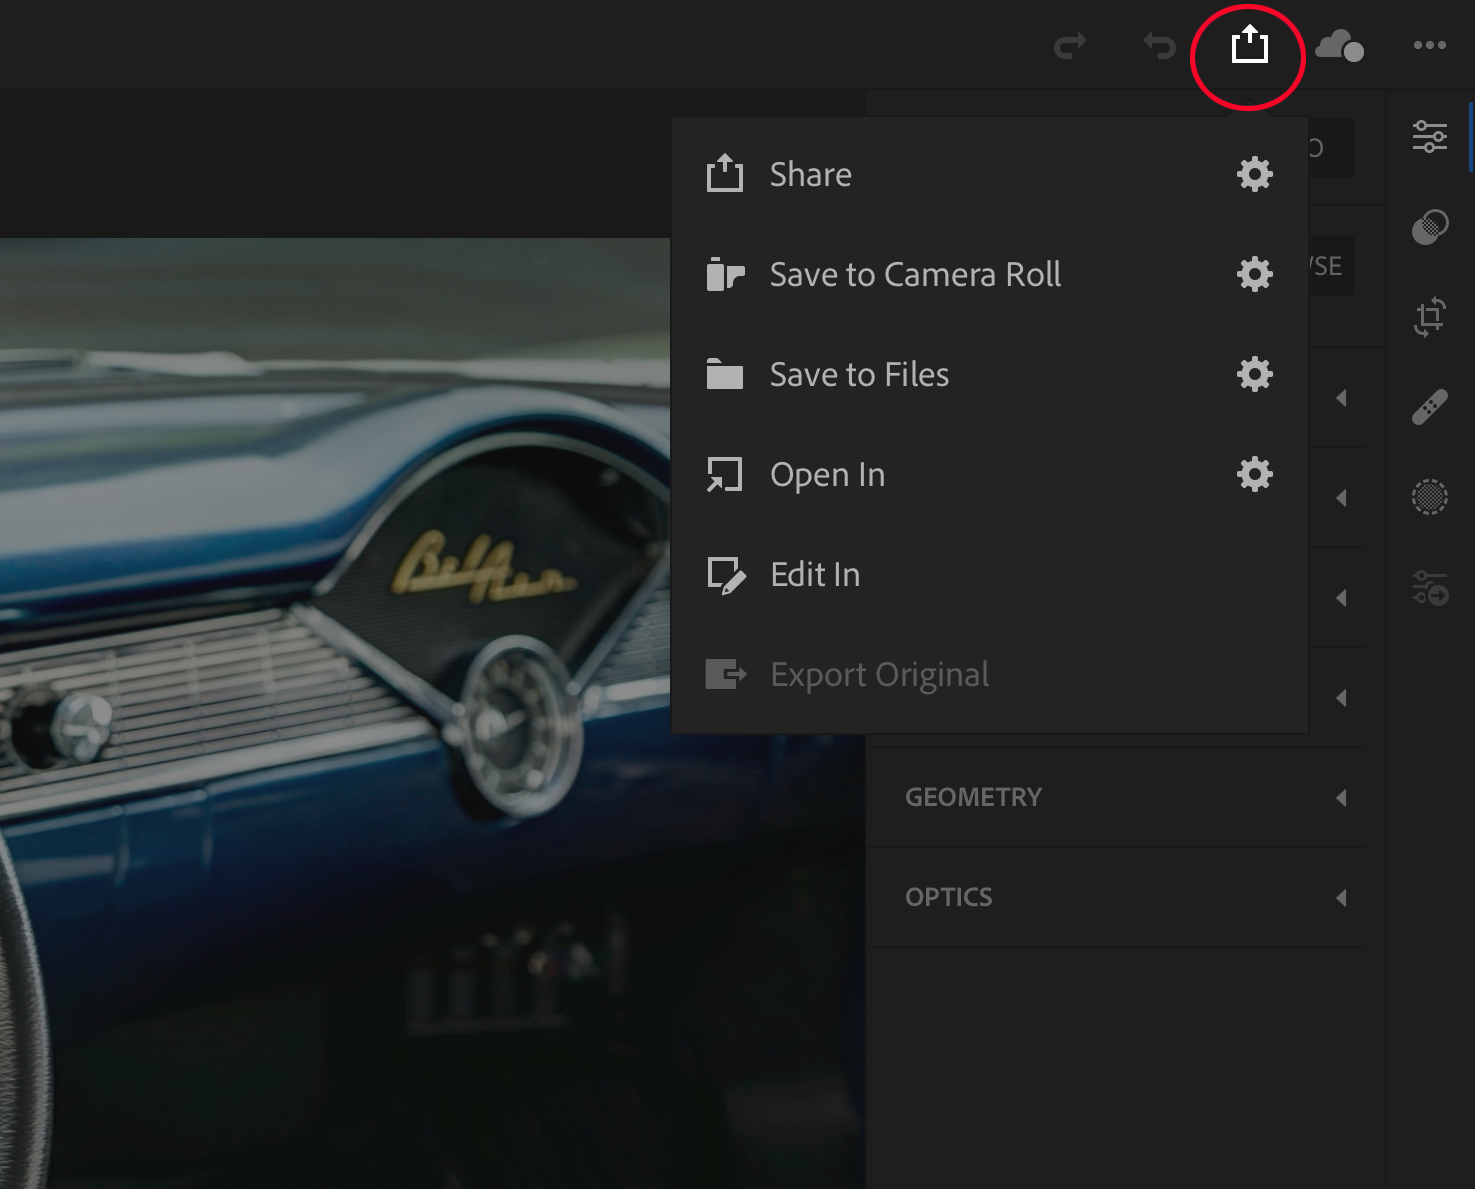
Figure 3
6) When the sharing dialog opens (shown in Figure 3) you have two different options. You can click Share and select Instagram from the meny, or you can choose Save to Camera Roll which lets you upload directly from the Instagram app instead of through Lightroom CC. I prefer to save the photo to my Camera Roll and use the Instagram app because it provides me with greater control. (See step 9.)
7) When you choose Save to Camera Roll, the Image Size dialog opens (shown in Figure 4). Choose Small – 2048px since you don’t need a large file for Instagram.
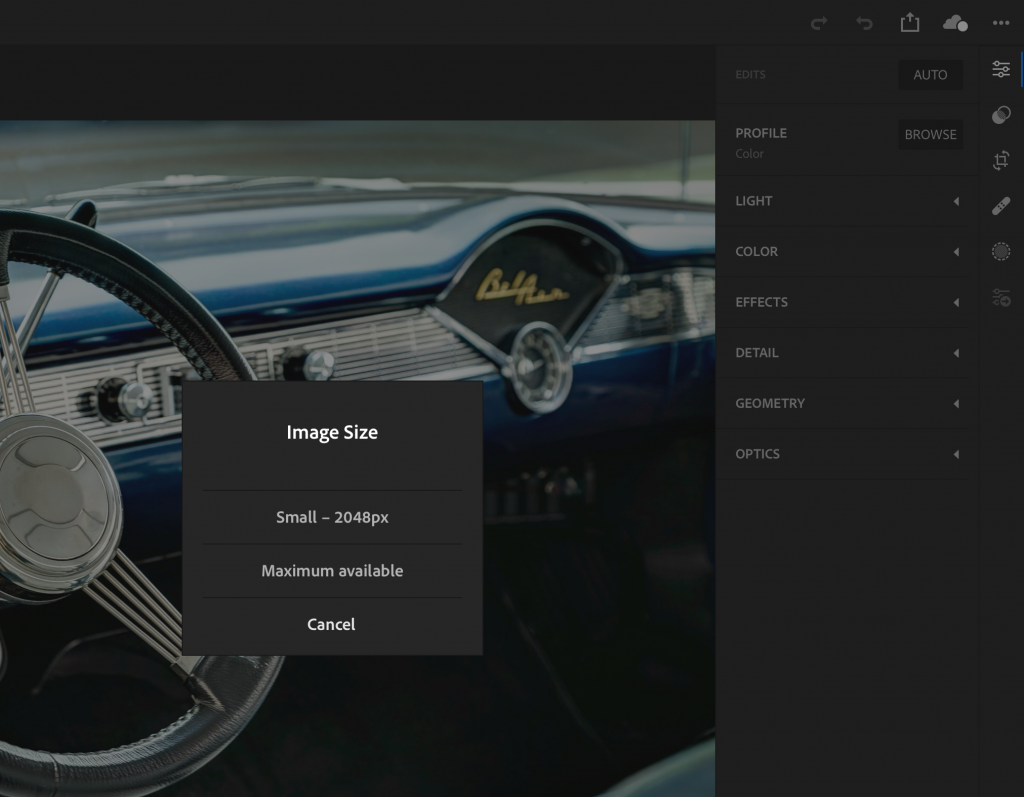
Figure 4
8) Now go to your Instagram app and upload the file using the usual Instagram method.
9) If you want to maintain your original crop instead of Instagram cropping to its standard aspect ratio, click the button at the bottom left, (circled in Figure 5).
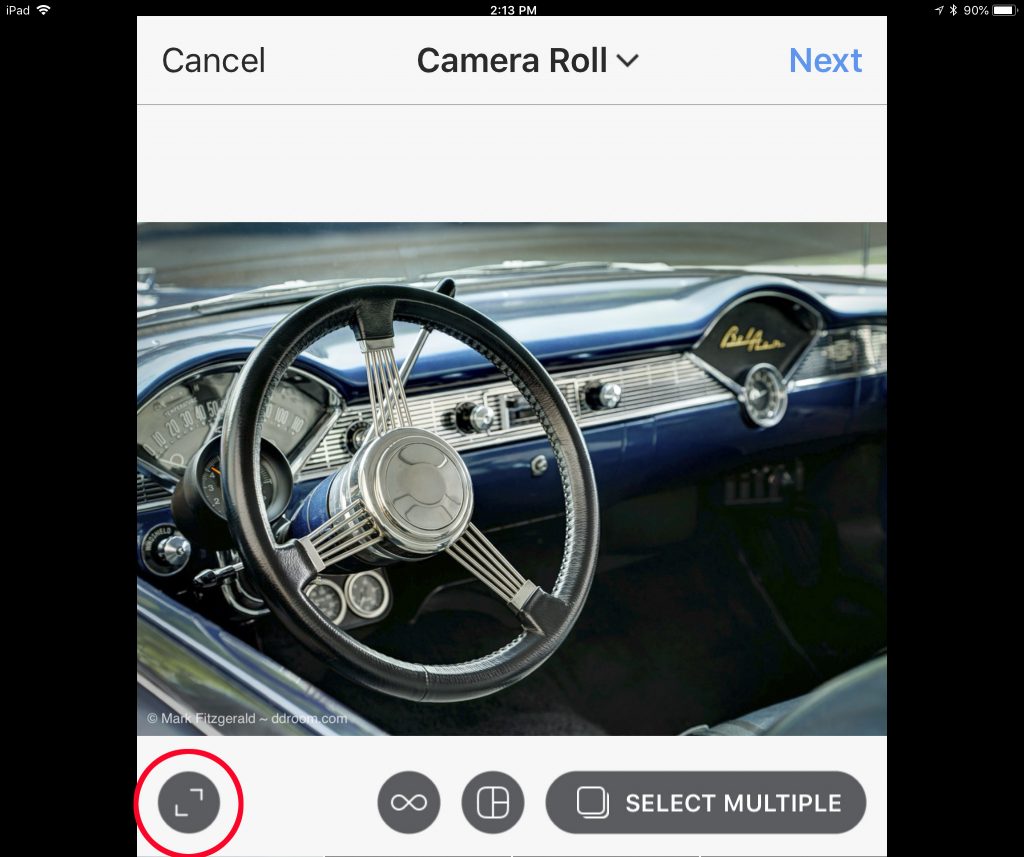
Figure 5
That’s all there is to it. Now when you want to add more photos to Instagram all you need to do now is select them and press B in Lightroom on computer. They will automatically sync to Lightroom CC on your mobile device. Then go to Lightroom CC on your device, save the photo to your camera roll, and used the Instagram app to upload it.
One other thing I like to do when uploading to Instagram is to add a copyright watermark to the image. If you want to see how to set that up so it happens automatically, check out this post: Adding Watermarks In Lightroom On Your Mobile Device.
TIP: Another advantage to this method is that after the photo is on your mobile device and you see what it looks like on that platform, you can use Lightroom CC on your device to make final tweaks before uploading it.